How to debug a GIMP python-fu plugin in VS Code
People all over the world seem to have trouble in GIMP script debugging
Hello! How are you guys doing?
We are the "MUD"*1 scientist team somewhere in the world.
Are you in trouble with the poor environment of GIMP's python plugin development?
YES!Rejoice humanity, the time has come!
You can now debug a Python-Fu pulgin in VS Code. This method is not formal and might be a hack. But if you're sick of GIMP's python debugging, it's worth a try.
Issue
- We want to set breakpoints, step through, and check variables in the Python plugin in GIMP.
- We want to do a Lint check of Python Code in GIMP. Nothing is displayed even if there is an error, so I have no idea what is wrong.
Required environment
- Windows 10*2
- Python 2.7.18 (Last version of Python2) : Not anaconda
- GIMP 2.10 (We checked on Ver. 2.10.24)
- Visual Studio Code (We checked on Ver. 1.56.2)
Preparation
Let's assume that you are ready for:
- Python 2.7.18 installed on [C:\Python27]
- GIMP 2.10 installed on [C:\Program Files\GIMP 2]
- Visual Studio Code installed on somewhere
And the system environment variables are set for Python 2.7.
Abstract
Python 2.7 included in GIMP 2.10 does not have a pip executable.
There are too many restrictions to install into this GIMP python environment.
So, once you install it in another Python 2.7 environment with pip, copy that packages to the GIMP environment. Debug with VS Code using a common remote debugger package that does not cause Gimp to error.
Attention!
However, there are many packages that do not work just by copying.(Since the python included in GIMP is customized for handling with GIMP, errors may occur when executing other packages.)
In order for the python package installed in GIMP to operate stably, Developers have set restrictions on purpose.
But we really want to install another package in the GIMP environment and debug with the IDE.
Make sure that you can undo this procedure, before performing this . Because it may destroy your precious environment.
Setup steps
Since it is a sample program for explanation, we will also introduce some unrelated packages. But it will be a reference for introducing various packages.
Core package is ptvsd, needed for remote debugging of VS Code.
- Step. 1: cd c:\Python27\Scripts
- Step. 2: ..\python -m pip install --upgrade pip
- Step. 3: pip install ptvsd
C:\Python27\Scripts>pip install ptvsd
Please upgrade your Python as Python 2.7 won't be maintained after that date. A future version of pip will drop support for Python 2.7. More details about Python 2 support in pip, can be found at https://pip.pypa.io/en/latest/development/release-process/#python-2-support
Collecting ptvsd
Downloading https://files.pythonhosted.org/packages/44/5b/fa477e4fd8e62c722febdc52462d7b037a77aa963c3e400a8e90e8f0d2c0/ptvsd-4.3.2-py2.py3-none-any.whl (4.9MB)
|UUUUUUUUUUUUUUUUUUUUUUUUUUUUUUUU| 4.9MB 2.2MB/s
Installing collected packages: ptvsd
Successfully installed ptvsd-4.3.2
- Step. 4: pip install pyyaml (*This is for use in the sample program.)
- Step. 5: copy C:\Python27\Lib\site-packages { \ptvsd, \ptvsd-4.3.2.dist-info} to C:\Program Files\GIMP 2\lib\python2.7\site-packages (*with administrator permission)
- Step. 6: copy C:\Python27\Lib\site-packages { \yaml, \_yaml, \PyYAML-5.4.1.dist-info} to C:\Program Files\GIMP 2\lib\python2.7\site-packages (*with administrator permission)
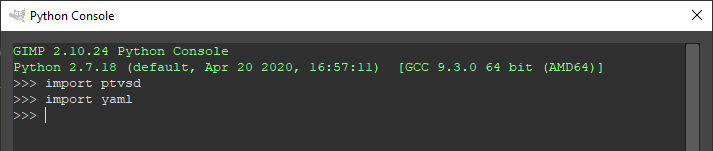
- Step. 7: Start GIMP program and Python Console operate with /Filters/Python-Fu/Console menu select. And input "import ptvsd"[Enter] and "import yaml"[Enter]. Check that no error is displayed on the console.
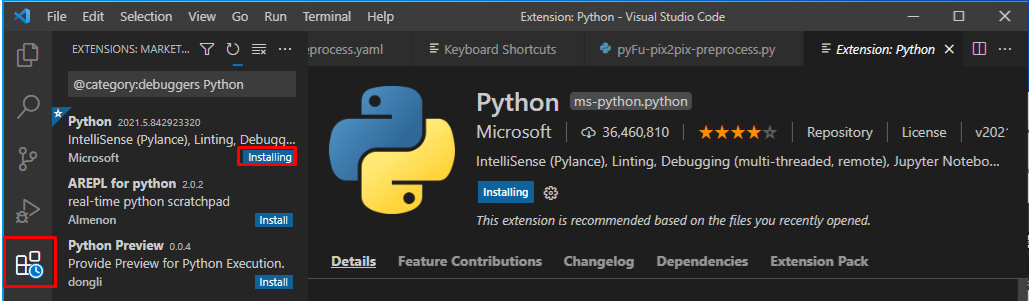
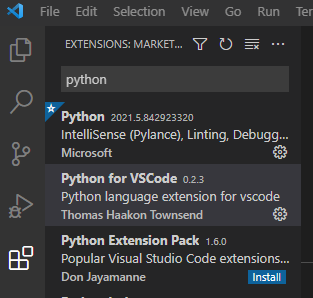
- Step. 8: Install Python extensions for VS Code.(Extensions of left pane/search: Python/Python(ms-python.python)Install
- and Python for VSCode(tht13.python)
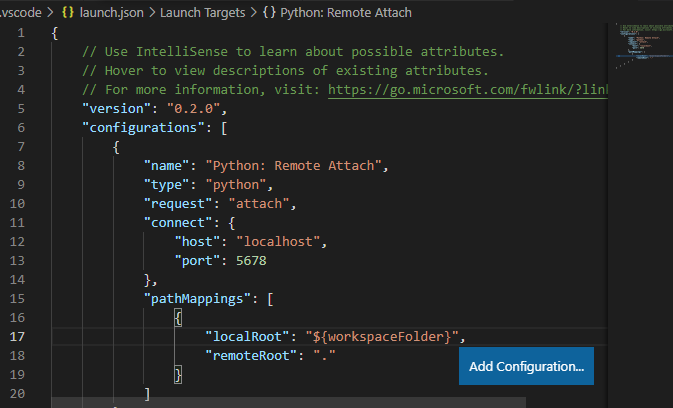
- Step. 9: Create a launch.json at VS Code: (Pass) If you have the information, you can create it here, but it is easier to do it only once at runtime.

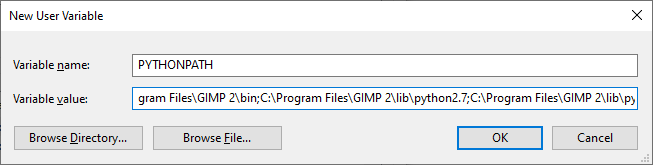
- Step. 10: Windows [Start]Right button/System/Advanced system settings/System Properties Dialog [Environment Variables...]button/User or System valiables [New...]/Variable name:[PYTHONPATH]/Variable value:[C:\Program Files\GIMP 2\lib\gimp\2.0\python;C:\Program Files\GIMP 2\bin;C:\Program Files\GIMP 2\lib\python2.7;C:\Program Files\GIMP 2\lib\python2.7\site-packages]
Now, You have finished the setup(Except for [launch.json]file definitions). Thank you for your hard work.
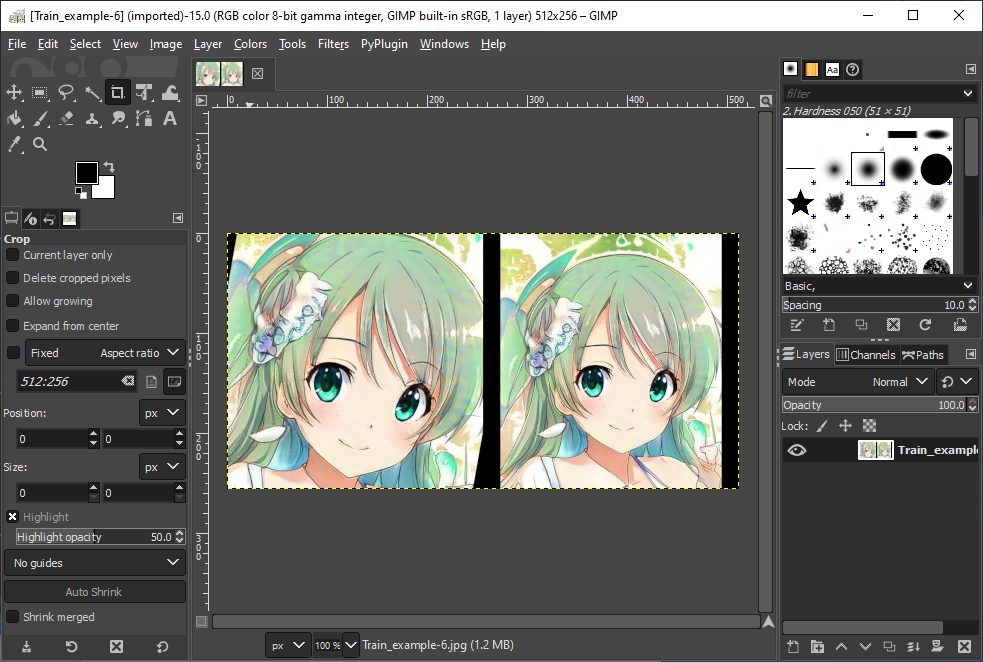
Preparation of sample program
Let's prepare a slightly longer program to check the debug.
By the way, "pix2pix" performs image translation.
The following sample program prepares images for "pix2pix" machine learning.
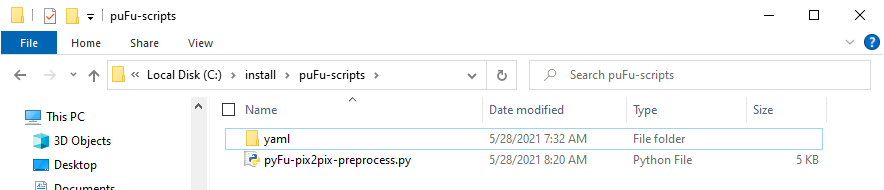
C:\install\pyFu-scripts\pyFu-pix2pix-preprocess.py
#!/usr/bin/env python
# -- coding utf-8 --
from gimpfu import *
import os, glob, time, math
import yaml
import ptvsd
PREFIEX_TRAIN='Train_' #Prefix of learning file (generation)
g_common = #sarray of yaml information
DEBUG = True #Debug flag
g_display = None #Handle for confirmation screen display
default_yaml_fullpath = os.path.dirname(
global g_common
def save_image_file(image, layer, out_dir, out_file):
file_path = out_dir +os.sep + out_file
def operate_image(image):
# Core Process see https://sites.google.com/site/non2title/
pdb.gimp_image_resize(image, g_common['work_area_x'], g_common['work_area_y'], 0, 0) #Resize campus(prepare an area where the original images are lined up side by side)
origin_layer = image.active_layer #Record the original layer
image.add_layer(new_layer, 0) #Add a new layer to the image
pdb.gimp_layer_set_offsets(new_layer, g_common['copy_move_x'], g_common['copy_move_y']) #Move new layer to the right
pdb.gimp_layer_scale(origin_layer, g_common['exp_resize_x'], g_common['exp_resize_y'], TRUE) #Enlarge the original layer from the center
pdb.gimp_item_transform_rotate(origin_layer , math.radians(g_common['rotaion']) ,TRUE ,0 ,0) #Specified angle rotation
merge_layer = pdb.gimp_image_merge_down (image, new_layer, EXPAND_AS_NECESSARY) #Integrate with the lower layer to make a new layer
image.crop(g_common['work_area_x'], g_common['work_area_y'], 0, 0) #Crop within the specified range
pdb.gimp_layer_scale(merge_layer, g_common['shrink_resize_x'], g_common['shrink_resize_y'], FALSE) #Resize integrated layer
pdb.gimp_image_resize(image, g_common['final_campus_size_x'], g_common['final_campus_size_y'], 0, 0) #Resize the campus
# Show image for For Debug confirmation (not showing as fast as I expected)
if DEBUG:
global g_display
if g_display is not None:
def pix2pix_preprocess(image, layer, in_dir, out_dir, e_type):
ptvsd.enable_attach()
ptvsd.wait_for_attach()
start_time = time.time()
load_yaml_file()
i_count = 0
for jpg in glob.glob(os.path.join(in_dir, '*.jpg')):
lap_time = time.time()
operate_image(work_image) #Image manipulation
out_jpg = PREFIEX_TRAIN + os.path.basename(jpg) #Image output
save_image_file(work_image, work_image.active_layer, out_dir, out_jpg)
lap = time.time() - lap_time
i_count += 1
if e_type == 2 and i_count >= 3:
break
#Leave only the last image displayed
elapsed = time.time() - start_time
register(
'pix2pix_preprocess', #The name of the command when called from the command line or script
'Pre process for pix2pix traning images', #Plugin description
'Batch execution of specified processing\nThis plug-in use pix2pix_preproces.yaml', #Detailed description of the plugin
'AssistantOfKoo', #Plugin author
'(cc)KooWells and thy servant', #Plug-in copyright holder
'05/23/2021', #Copyright date
'<Image>/PyPlugin/Pix2pix PreProcess', #Label used for plugins in menu
'RGB*, GRAY*', #Type of image to be processed by the plug-in ex. RGB, GRAY, etc.
[
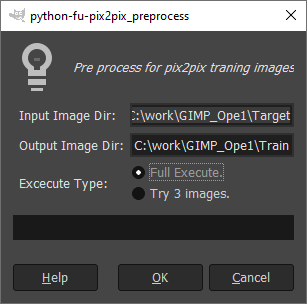
(PF_RADIO, 'exe_type', 'Excecute Type:', '1', ( ('Full Execute.', '1'),
('Try 3 images.', '2') ) )
], # Input screen items
, # Return value
pix2pix_preprocess) #Method name
main()
C:\install\puFu-scripts\yaml\pyFu-pix2pix-preprocess.yaml
common:
work_area_x: 2048
work_area_y: 1024
copy_move_x: 1024
copy_move_y: 0
exp_resize_x: 1280
exp_resize_y: 1280
rotaion: 10
shrink_resize_x: 512
shrink_resize_y: 256
final_campus_size_x: 512
final_campus_size_y: 256
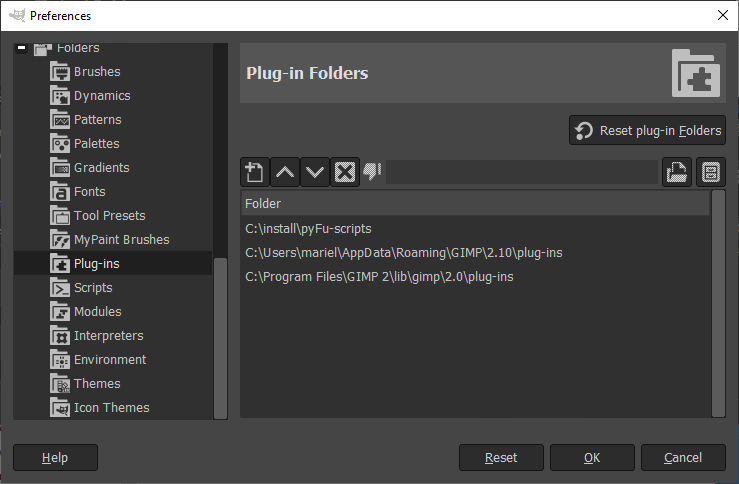
Setting additional folders for developed plugins
/Edit/Preferences menu/[+]Expand the Folders in the left pane/Plug-ins/[+]add a new folder [C:\install\pyFu-scripts]/[^]Move the selected folder up/[^]Move the selected folder up/[OK]button
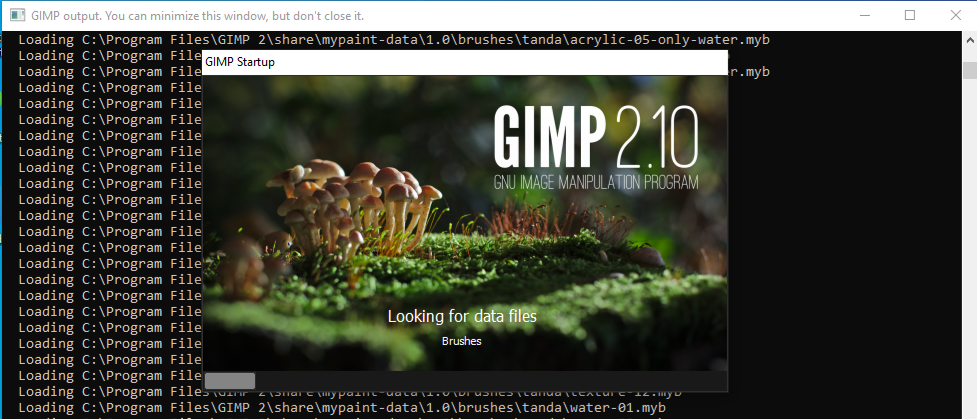
Restart the GIMP program with --verbose and --console-messages options.

Check the sample plug-in
If there is an error, console display like this:
If OK, no error message is displayed after "Querying plug-in:" message.
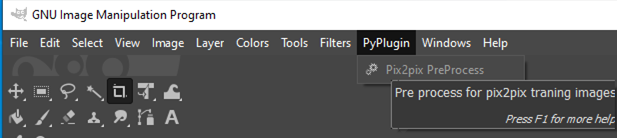
And a new menu appears.
If you really don't know the cause of the error, try the following:
execfile('C:\install\pyFu-scripts\pyFu-pix2pix-preprocess.py')
Report any errors,
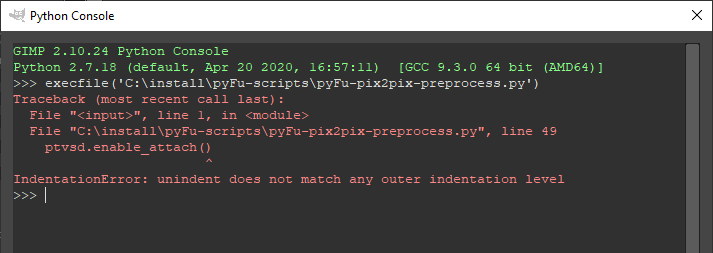
But otherwise the plugin will crash.
Or if you check the source with VSCode, you will be able to suggest what is wrong.
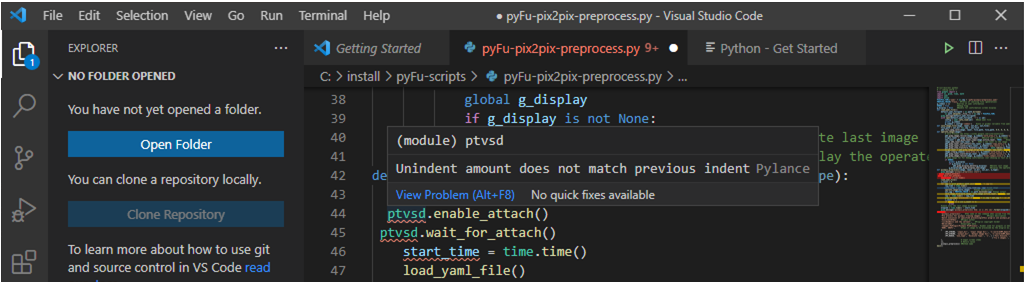
Please fix my bug that I inadvertently forgot to fix. There are at least two mistakes.
Those who copied and pasted may be missing two more [ ] .
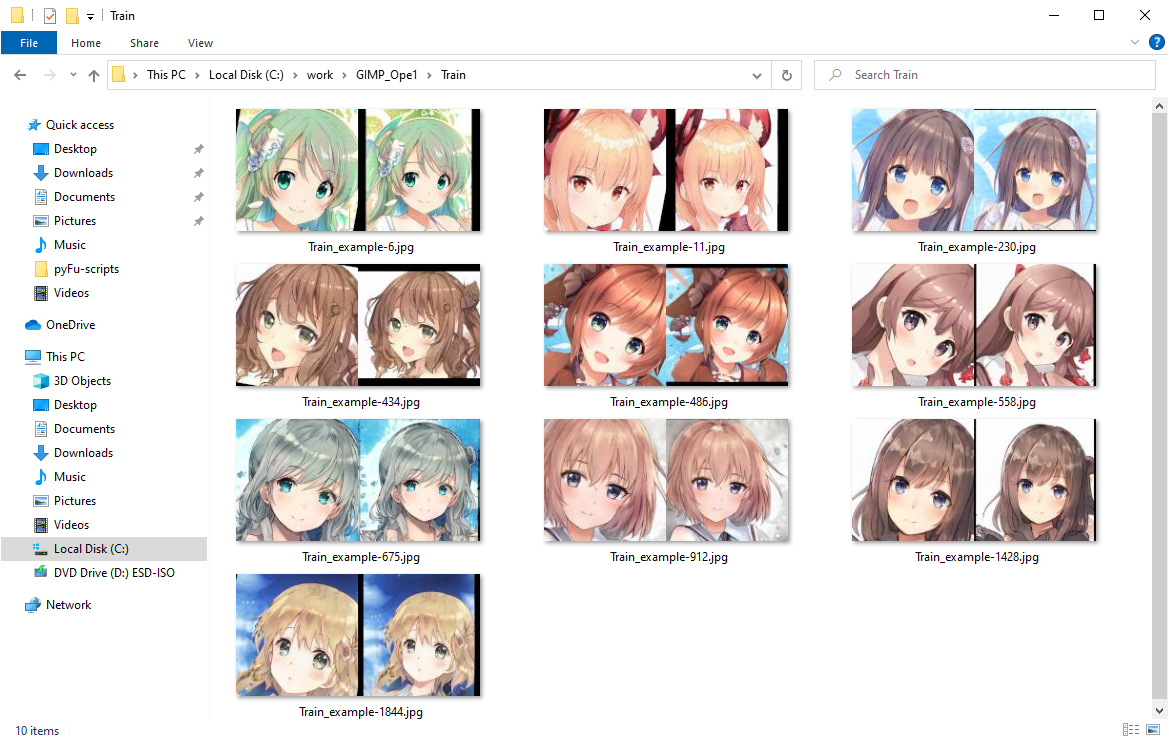
Operation
(1) Prepare some 1024x1024 pixcel images in the [C:\work\GIMP_Ope1\Target] folder.
(2) Launch the GIMP program, and /File/New/Create a New Image.
(3) /MyPlugin/Pix2pix preprocess/ launch the dialog.
(4) Click the [OK] button. (wait for socket connection)
(5) If the firewall asks for confirmation, [Allow access] if there is no problem.

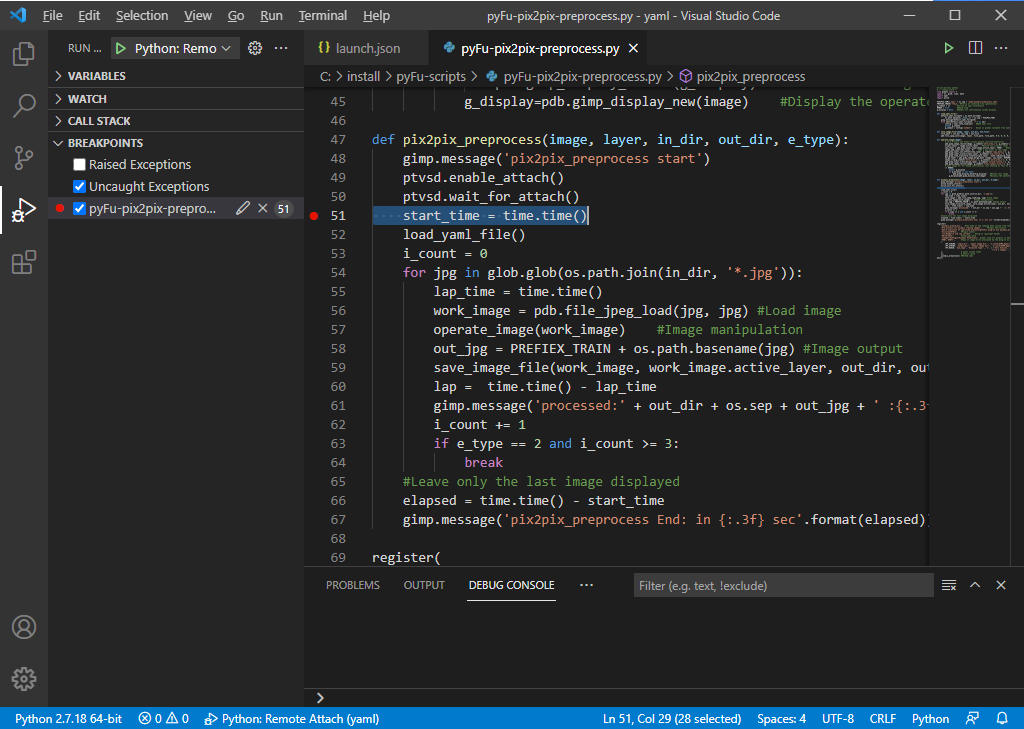
(6) Open the [C:\install\pyFu-scripts\pyFu-pix2pix-preprocess.py]file at the Visual Studio Code.
(7) Set break point at the source.
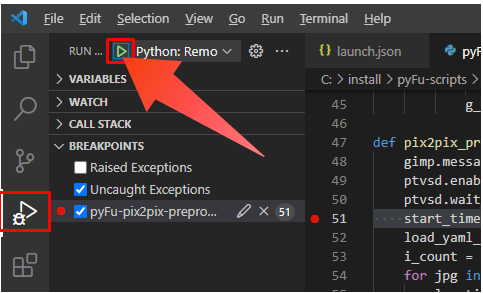
(8) Run and Debug (Left side pane |or| Ctrl + Shift + D) / [Run and Debug]button click/Remote attach /"localhost"[Enter]/"5678"[Enter] or select defined connection.

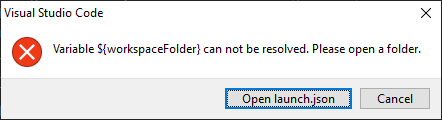
[Open launch.json]button click/open a folder (left pane)

input:[C:\install\pyFu-scripts\yaml] /]Select Folder]button click (for example)
Up to this point, the operation check has been completed, and the actual registration is yet to come.
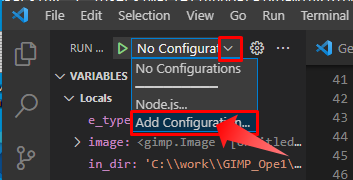
Select a Add Configration menu and do the same operation as before.
That will generate a launch.json file.
And you can do remote attach oparation as select Start Debugging dropdown and click the execute triangle icon.
(9) After remote attached, stop at the break point. and you can check the contents of stored variables.
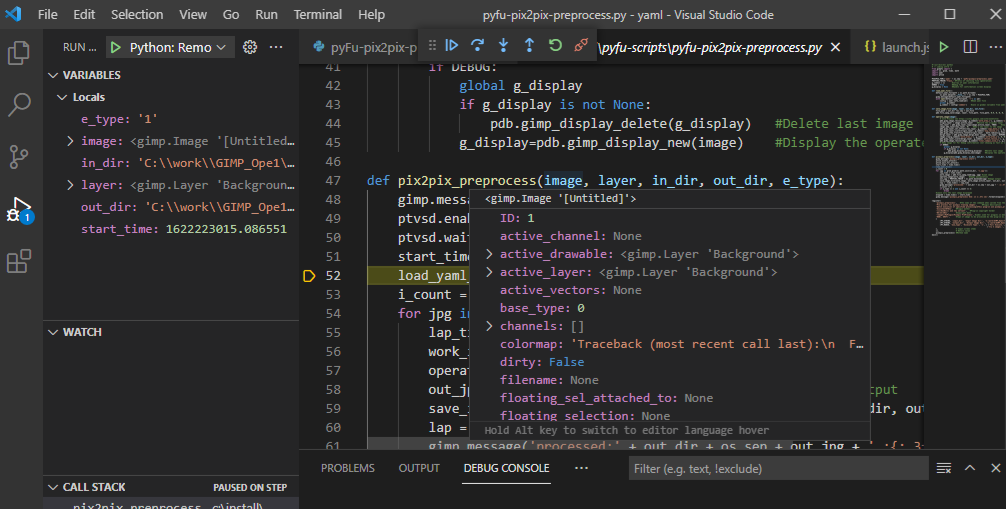
and the color of the bottom of the window turns orange, indicating that it was attached.

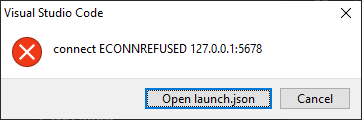
If the target dialog is over, an error will be displayed because the connection cannot be made.
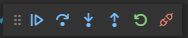
(10) If attached, and you can continue, step over, step in, and step out. You should not use restart, because it causes a plugin crash.
We can use these processed image files to train "pix2pix".*3
Now you are a specialist in GIMP's python debugging.
Thank you for reading though it is long. And may happiness come to you.
(CC) KooWells and thy servant 2021.
*1:Why is it "MUD"? Because our boss is a frog or something spiritual being of "Gaia" or something "Chaos" from out of space :-)
*2:We checked on Windows 10, but the theory would be the same on MacOS and Linux or other IDE.
*3:These sample images are from the "This Waifu Does Not Exist." : https://www.gwern.net/TWDNE